Showing posts with label kitchen adventures. Show all posts

Wednesday, July 27, 2011

No Bread for You


This happened such a long time ago I almost forgot about it until I came across this photo. My wonderful, awesome, Tennis blogger sister gave me the Tartine Bread Cookbook for Christmas and I finally decided to give the basic country bread a try. Do not be fooled by the name of the bread. Even though Chad Robertson tried to simplify his process for the home baker, it's still pretty complex. I studied the recipe religiously for weeks before diving in. It is intimidating, but not impossible. In the meantime, I embarked on my first attempt at growing a healthy starter. 

Real bread bakers use home grown starters to bake bread. Making a starter, or "mother", is actually not too difficult. After all, it's just water and flour mixed together and left out on the counter. But it takes a lot of love and a watchful eye (and nose) to make a starter that will be flavorful and strong enough to bake into a rustic loaf. Everyday at the same time, you have to discard about 80% of the mixture and replenish with fresh flour and water. The bacteria will feed on this fresh flour and water mixture, create gas bubbles, rise and then fall. The goal is to train the starter to rise and fall in a consistent manner. It's like having a puppy and you definitely get attached to it. It's a alive. You start talking to it. You yell at it for smelling bad. It makes messes you have to cleanup. But you continue to give it love. 

Anyways, after about 2 weeks, I got my starter, which I named "Gross", to where the book said it should be. I set my alarm for 6am on a Saturday so we could have some fresh bread for dinner. I'm not a morning person, so I of course measured out my ingredients wrong. I literally messed up on the very first step. Heartbreaking! And of course, I didn't have enough starter to start over...so that's where this story ends. No pretty pictures of fresh crusty bread. No stories about how easy and fun this recipe was. It wasn't easy. And it wasn't that much fun either. Sorry. 

It turns out, my fake oven doesn't even get hot enough to bake this bread, so even if I hadn't been a bozo and messed up on step 1, I would have found out by step 8 that this was a lost cause. It just wasn't meant to be. Maybe one day, when I have a real oven, I'll give it another go, but until then, the Tartine Cookbook is getting packed away. 

If you do ever try making a starter, I highly recommend keeping a daily log of the look and smell of your starter. Keeping track of the times you feed it and how it behaves throughout the day will help you with making adjustments so that you get a sweet, flavorful loaf.

Tuesday, July 19, 2011

Home, Sweet Home :: World Kitchen

I was a little bored this weekend and decided to take some snaps around the house. It turned out to be a fun couple of hours. It gave me the opportunity to marvel at all the weird stuff we've accumulated over the past 2 years.

 I'm really proud of all this weird stuff!

I love this. These are the various sauces and seasonings that sit on my counter top. 

 From left to right: Mediterranean sea salt, rice vinegar, olive oil, grape seed oil, thai fish sauce, light soy sauce, mirin, parmesan cheese, maggi sauce, black pepper, kochujang, sesame paste, shichimi, chinese chili oil. 

Smiley spoon, various mismatched chopsticks in empty sake one cups

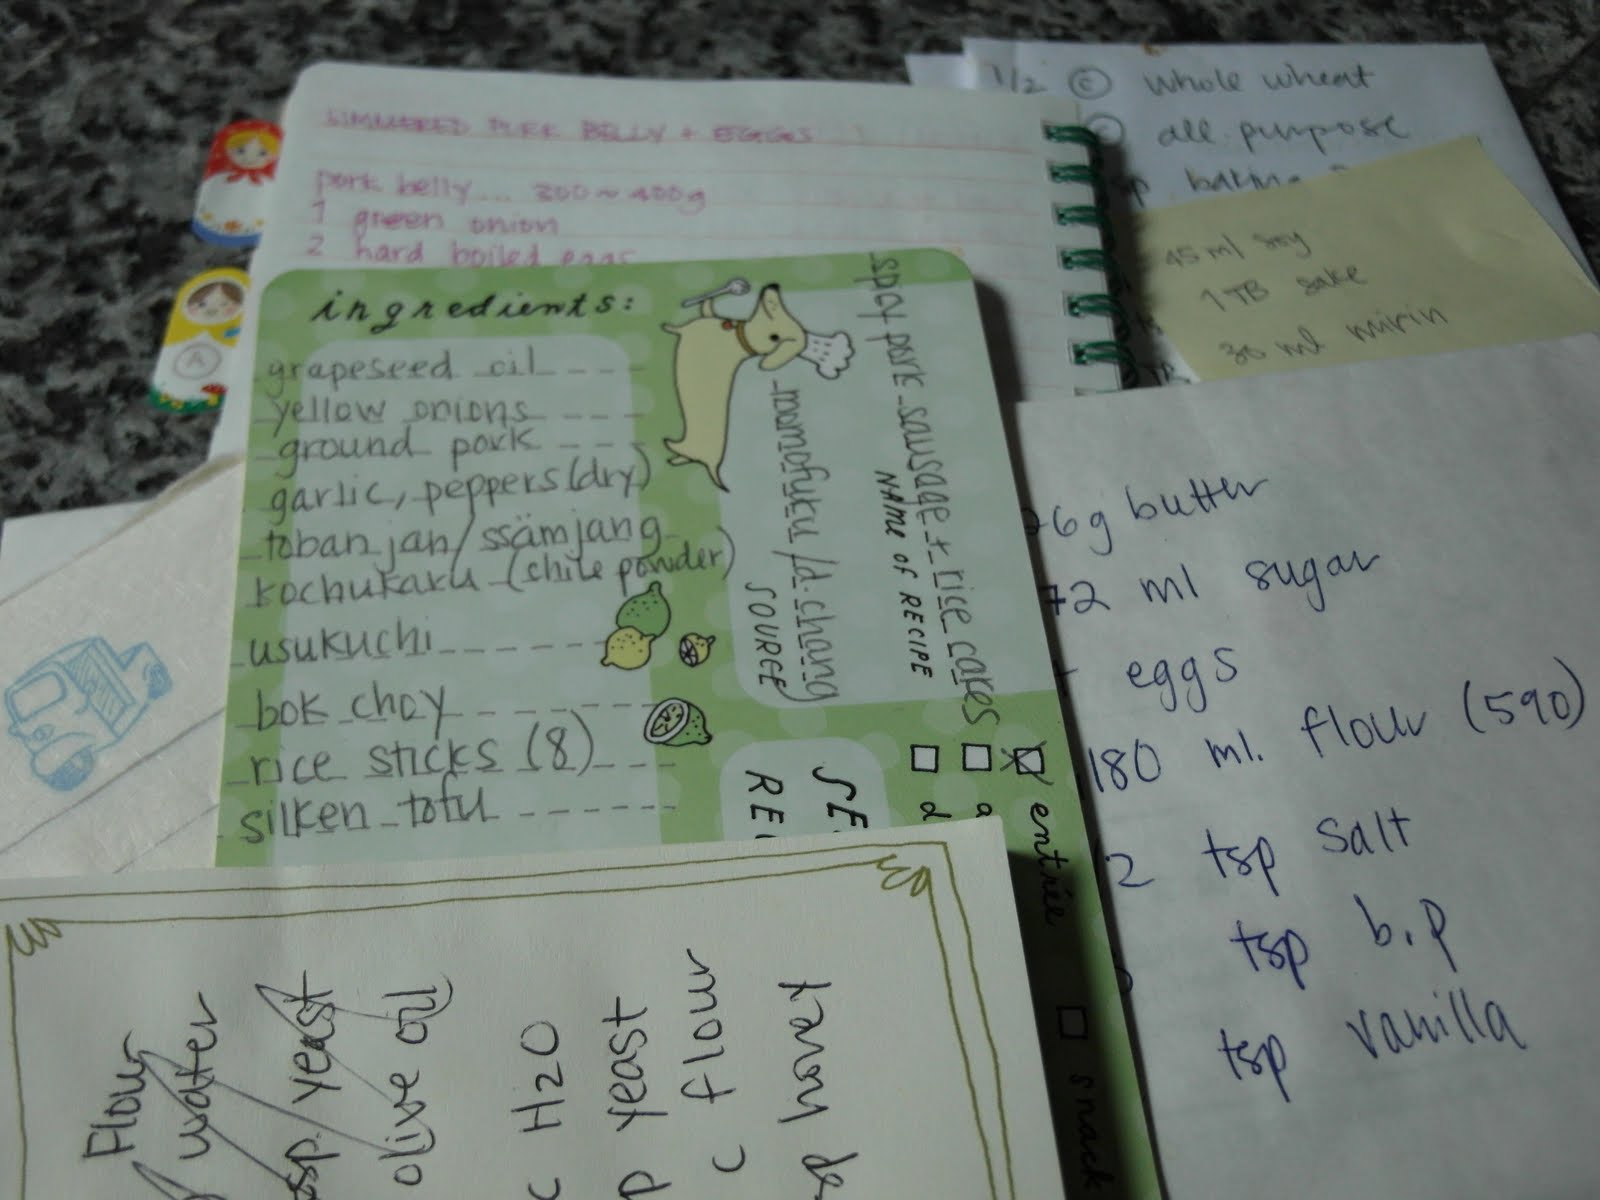
These were actually scattered around all over the kitchen. I have a tendency to make lists of ingredients from recipes on the super cool internet on the back of whatever is near me - old bills, actual notebooks, cute stationary from Japan and elsewhere

Fridge craziness. This is actually a really great story board of our life in Japan so far. Every piece has a memorable/funny story behind it and you might recognize some of the stuff because you gave it to me. Congratulations! You've made the fridge of fame! 
Doodles of Squidward killing animals in various super radical ways

Moneys from around the world, running bib, silly magnets

I love getting post cards. They seem to be falling out of fashion, which makes receiving them even more of a delight. If you send me a postcard, it goes straight to my heart and onto my fridge

Sunday, November 21, 2010

Making Creme Fraiche :: A Journey

So, as you know, I'm pretty obsessed with the Flour Cookbook right now. Joanne Chang says that her magic ingredient is Creme Fraiche. When I lived in NY and was feeling fancy (which, let's face it, was all the time) I would buy creme fraiche, whip it with some sugar and eat them with strawberries. I don't know why I felt that this was necessary. Maybe it made me feel like I was living in a magical world like Amelie and not in a tiny apartment with a rat named Stuart above a pizza joint.

In any case, I like to stay true to recipes so that I can blame the recipe and not myself if things don't work out. Creme Fraiche is not sold in Japan. At least not in any of the 7 grocery stores I checked this week. So, I googled around and learned that it is really easy to make at home and only takes about 24 hours. In theory. It took me about 7 days, 7 cartons of heavy cream and a lot of experimenting. Why?

1. Because I am not my mother or Alton Brown, and don't know the slightest thing about food sciences.
2. Because I live in Japan and am limited in my ingredient acquisition.

Round 1: Buttermilk and Heavy Cream

The most common recipe for Creme Fraiche (online at least) is to add 2 tablespoons of buttermilk to a cup of heavy cream and let it sit at room temperature for 1 to 3 days. Easy enough. Buttermilk is not sold in Japan, but I also learned from ABC Cooking School friend and various online resources that you can easy make it at home.

How to Make Buttermilk: 
Just add 1 tablespoon of white vinegar to a measuring cup, then add milk until you reach the 1 cup line. Let it stand for 5 minutes, and you have buttermilk!

Sort of. Actually, this will give you a very good buttermilk substitute. There are no live active cultures in it, which is not necessary for making delicious buttermilk pancakes and biscuits, but definitely necessary for making creme fraiche. Unfortunately, I learned this the hard way when I realized that the heavy cream I left out for a day was still very runny, a little curdled and super rancid.

Round 2: Buttermilk Powder

This round didn't actually last long because I was wise enough to google the answer before wasting another carton of heavy cream. I found buttermilk powder, another good buttermilk substitute for baking, at a kitchen supply shop in Shinjuku. Again, no active cultures thus, no creme fraiche.

Round 3: Sour Cream vs Yogurt

I finally wised up and did some hardcore forum trolling. Though buttermilk + heavy cream is the more popular method, you can also make creme fraiche with heavy cream + sour cream and heavy cream + yogurt. Sour Cream and yogurt are both readily available here, so this seemed like a positive turn in my quest for this stupid cream.
 The players. On the left, 1 cup of heavy cream and 2 tablespoons of sour cream. On the right, 1 cup of heavy cream and 2 tablespoons of plain yogurt with active cultures. 

So, how'd it all work out? On the left, the sour cream version. On the right, yogurt. They both thickened up quite a bit, even after a few hours. The sour cream version was by far more flavorful, creamier and most resembled creme fraiche. The yogurt kind was passable, but kind of a loser.

So there it is! Sour cream wins and I can now sleep at night. I read while I was at the bookstore today, that Julia Childs preferred homemade creme fraiche made with sour cream to that made with buttermilk because it was less tangy. I'm ok with tang, but if it's what Julia prefers, that just makes it all the better. 


 How to Make Creme Fraiche in Japan (or anywhere you can find Sour Cream) 

 1. Heat 200ml (1 cup) of heavy cream (35% fat or more) on low heat just take the chill off.
2. Add 2 tablespoons of sour cream to a jar, cup or bowl. Add about 1/4 cup of the warmed cream to the jar and mix until smooth. This works out all the clumps of the sour cream. Using just a little cream makes it easier (and cleaner) to mix vigorously. Then add the rest of the cream.

 3. Cover loosely with saran wrap, a tea towel or jar lid. Place in a warm spot for 24 hours. I chose the top of the fridge because I read somewhere that this is the warmest place in your kitchen. Another good spot would be your oven with the oven light on. Mix every 6-8 hours if you can.

4. After 24 hours, it will be much thicker. Give it a good mix, then cover properly and put it in the fridge for another 24 hours. It will thicken up more in the fridge and can be used immediately. I don't know how long it will keep, but I imagine 4-5 days. Just be smart about it - you know bad dairy when you smell it.

Tuesday, September 14, 2010

Trying It At Home :: Pain d'Or


I've been taking bread classes for about a month now. To be honest, I wasn't that excited about the bread course. I was more interested in the cake classes but I figured, I should branch out and try something new. It wasn't enough that the classes are in Japanese, I needed even more of a challenge. I'm such a go getter!

I'm so glad I went outside my comfort zone because making bread is AWESOME. Aside from a phase in my parents' life when a bread maker was purchased and used to make walnut and raisin bread, I don't have much experience baking bread. After 7 classes, that is no longer true. Up until last weekend, I had been under careful supervision which means that my recipes turned out perfect every time. I decided to take the training wheels off and give the pain d'or recipe a go.

Here we are with the basics. Bread flour, yeast, sugar and eggs. Two points to note here: always put the bread and sugar next to each other since as we all know from chemistry, yeast eats sugar and putting them close to each other accelerates the process. The egg should be somewhat separate from the sugar and yeast for reasons I'm not quite sure of because, like I said, my classes are in Japanese. All I know is that we always need to make an "egg pouch" in the bowl.
Here we are with more bread flour, salt and butter. This is the beginning of the dough formation process. Stir like a mad woman until the mixture turns into a ball.
Thank goodness for the marbal countertops! Dump the ball of dough onto a clean work surface and start kneading. There are two types of needing...the uhh...normal kind, which is to mix and work the dough. Once the dough is mixed well enough, it is time to move onto the V-style where you roll the ball back and forth in a V shape. When the surface is smooth and you see big gas bubbles, your dough is ready to rest.
After the dough has rested for awhile (each recipe calls for a different time, but it's normally around 30 minutes) you can do a finger test to see if it is ready. Coat your finger in flour and poke the dough. If the hole stays, it's ready. If the dough springs back, it needs to rest more. If your dough is ready, punch the ball a few times to release the gas.
Cut the dough into equal parts and shape them into round balls. Before you work the dough more, they need to rest again for about ten minutes under a damp towel.
Each recipe calls for a different shaping. Pain d'Or look like little mini-baguettes with cuts at the top. I've always wanted to make the cool cuts at the top of bread! Dream fulfilled! A healthy brush of egg wash on top and into the oven they go!
And voila! These baked for only 12 minutes and they were nice and fluffy. This was a really simple bread but most of our classes involve all of the steps above with varying rest times, toppings, fillings and shapes. This first solo attempt was successful, but not perfect. Hopefully the next batch will be better but even imperfect fresh baked bread beats the store bought variety.

Tuesday, August 24, 2010

ABC Cooking Studio Bread Course :: Orange and Almond Buns


mMMmmmMMm! Now that's what I'm talkin' 'bout! Class number 2 had us baking a sweet bread with an almond and candied orange topping. They are divine. I was worried that with all the sugar and almond paste, it would be too sweet but the candied orange peels really balanced things out. 

All purpose flour is not common in Japan (or I just haven't come across it in the grocery store.) Instead, flour is is divided into two types: strong (bread flour) and weak (cake flour). The kabocha bread we made in class 1 only used strong flour. This sweeter almond bread used a mixture of weak and strong and you can definitely tell the difference. This bread was lighter and more resembled a bun. 

Our teacher this time around didn't speak any English but the ABC staff was overly helpful in preparing us. They are really nice and though we didn't need help with translating, it was comforting to know that they were keeping an eye one us. If any other expats in Japan are interested in taking these courses at ABC, I highly recommend starting out at the Tokyo Midtown branch. Since it's in the heavily foreigner populated Roppongi area, their staff is much more skilled with their English. I'm learning a lot of vocabulary and am starting to feel more comfortable using my limited grammar constructions. Thankfully, the Japanese language employs a few very common words for certain situations and I have those ones down pat. (Delicious! Looks delicious! So skilled! Ok! Difficult!) In English, you might sound like you have Tourette's, but in Japanese, it's perfectly normal to just shout out verbs and adjectives and expect people to understand you. 

I want to share some of the recipes from the classes because bread baking it really fun and actually quite easy. However, when we signed up, I signed a crazy 3 page contract (all in Japanese) and I think one of the 100 points was that I wouldn't share or sell their recipes. The details are hazy and I'd rather not risk it. So, I'm planning on coming up with some variations of my own and will post back later. 

And of course, apologies to my Gluten Free gals out there...I'll be sure to cook up a nice juicy steak in a future post as well. 

Thursday, August 19, 2010

ABC Cooking Studio Bread Course :: Paprika Kabocha Bread

It's been a year since I first went to ABC Kitchen to make a low calorie brunch. I guess their policies have changed since then because I am now allowed to take their bread and cake courses even though I speak very little Japanese. I suppose they've learned that for the most part, the monkey see, monkey do approach to learning works pretty well. (No offense to us foreigners. That was an unintentional reference to us being monkeys.)

I took my first class tonight with a friend. She's much more talented with handling bread dough. I was a little lost and got a tiny bit behind, but everyone was very encouraging. It helped that there were 2 other English speaking expats in the group that had taken a few classes. They were nice enough to show us the ropes. Our teacher also spoke quite a bit of English, but we were warned not to get used to it. Message received! Trying to read all the kanji and baking jargon in Japanese was pretty overwhelming, but in my defense (or not) I didn't really prepare too much. Despite this, I had a lot of fun. At one point, I emphatically stated to my cooking partner that I was having so much fun. It's true!  It's a really satisfying experience. You get your hands dirty, work up a sweat kneading and the final outcome is pretty and delicious. Maybe this is what men feel like when they beat each other up or grow beards in the woods.

There are 8 classes in this first introductory course. This first class gives us a foundation for all the breads we'll be making in the future. It's a simple flour, water, yeast, butter, salt and sugar mixture then topped with red peppers (paprika apparently...who knew?), black olives and kabocha (Japanese pumpkin). Underneath the veggies is a healthy smearing of mayonaise mixed with mustard. It is a pretty typical recipe for Japan. For us monkeys, it may sound and look pretty weird but in the end, it tastes delicious. Next class is Monday!

Monday, August 2, 2010

Summer Time, Time for Summer Rolls

It is still balls hot right now in Tokyo. I'm apparently allergic to A/C so I've been using it in tiny spurts here and there but for the most part, the apartment is just too hot to cook in. While I've enjoyed eating out, I just could not kick a craving for fresh summer rolls. And who better to make it than me? Thankfully, summer rolls require very little cooking.

After I made my first roll, I literally jumped up and down and squeeled with glee. Partly because it looked so pretty and partly because this is the first time I've ever made goi cuon on my own and I managed to do it in Japan. I cannot stress to you more, the frustrating nature of wanting to make a certain dish and not be able to do it properly (or at all) because you can't find the right ingredients. (Cue slideshow of failed attempts to make thit kho, risotto, pie, chicken curry and tomato sauce) For me, cooking in Japan takes a lot of effort. In order to make these 10 spring rolls today, I went to 2 grocery stores, translated Vietnamese and Chinese into Japanese, try to find sufficient substitutes for the things I couldn't find and then hope that it all worked out. That one spring roll gave me so much joy because it represented one of the very few victories in my kitchen this year. I guess it's just a good reminder that cooking is hard and I don't know...be more prepared? Hopefully I'll have more victories in this 2nd year in Japan. I'm a little bit more hip to the game and more aware of the things I can or cannot get at my local grocery store.

So yeah, I made summer rolls or goi cuon (salad roll). Aside from assembly, the cooking part of this recipe couldn't be easier. It's a good thing my mom put me through Vietnamese Rolling Techniques bootcamp last summer.

Ingredients

(there is no green tea in this recipe, I just have a messy kitchen) 
  • 10 shrimps, shelled and deveined 
  • 1/2 lb of pork loin or roast 
  • Vietnamese rice noodles
  • Vietnamese rice paper
  • Lettuce (I have no idea what kind I used, but it resembled butter lettuce) 
  • 1/2 cucumber, halved and sliced thinly
  • Cilantro
  • Mint
  • Chinese chives or scallions 
1. Poach the shrimp in salted water until cooked through. Halve the shrimps when cool enough to handle.  
2. Poach the pork in salted water until cooked through. Slice thin pieces of pork when cool enough to handle. 
3. Cook rice noodles in boiling water until cooked through. Rinse under cold water. 
4. Fill a large bowl with warm water. 
5. Dip the rice paper in the bowl of water so that the whole sheet gets wet, but don't soak it. You'll have to figure out how much water to use for yourself, but rice paper absorbs water slowly. You may think it's not soft enough but just be patient. 
6. Set the rice paper on a clean cutting board. First place the lettuce on the side closest to you. Top the lettuce with noodles, then mint, then 2 pieces of pork, then cilantro. Place 4 slices of cucumber directly on the rice paper above the lettuce. 
7. Roll the rice paper half way, then stop. Add 3 pieces of shrimp onto the rice paper. Fold in the sides. Place 1 leaf of the chive onto the shrimp so that it sticks out of one end. 
8. Fold in the sides of the rice paper and finish rolling. 

TADA! Wasn't that easy? There's a really good rolling tutorial here. 

The dipping sauce is a combination of hoisin, Sriracha and chunky peanut butter cut with a little bit of water. Play around with your own proportions because I'm too lazy to think about how exactly I made mine tonight. I think it was something like, 2 TB Hoisin, 3 TB PB, 2 TB water and a healthy squeeze of Sriracha. 

Tuesday, June 15, 2010

Soba Squidward Style


This weekend, I spent a day with some girlfriends in Saitama, the suburbs of Tokyo. The area we traveled to was known to have really good soba, so I picked up some fresh noodles as a souvenir. Souvenirs you can eat are pretty much the only kind you should ever both with.

Squidward doesn't cook much. The kitchen is my domain with the exception of PBJ sandwiches on Fitness Bread and the occasional fried egg. No complaints, that's just how things shake out in this house. But every chef, professional and amateur, has a signiture dish and soba noodles with bean sprouts and a fried egg is Squidward's. Simple and delicious, I was treated to this masterpiece on the first day of the rainy season in Japan. This, coupled with a Japan winning their World Cup opener made for a lovely evening.

Tuesday, March 9, 2010

Everyday Harumi :: Tsukune

Now this is what I'm talkin'bout. Don't those babies look tasty? Tsukune. Hands down my favorite type of yakitori, or grilled chicken. When you eat yakitori, you usually get a choice of either plain salt and pepper or tare, a teriyaki like sauce. You can almost always find yakiyori at an izakaya  (Japanese pubs) staple, and I could (and have) eat it all night long. (Specifically, at Oh! Taisho on St. Mark's in NY) Who doesn't love eating chicken with cold beer? Tsukune are usually made with minced chicken, so even though Harumi's recipe calls for pork, I went with chicken. Raw ground chicken, by the way, is my absolute least favorite thing to cook with. It is just...too fleshy looking and the texture is gnarlsburgh. However, I love tsukune so much that I powered through and overcame.

This recipe is again, really simple...so simple that I can recite the recipe off the top of my head: 300g minced meat of choice, 2 TB plain flour, 1 medium egg, 1/2 an onion roughly chopped, 1 celery stalk roughly chopped, 5 basil leaves roughly chopped. Salt and pepper to taste. Mix all the ingredients in a bowl but add the basil at the very end to maintain a nice color. Make 5 cm wide balls. Cook in a lightly oiled pan - brown both sides. DONE.

Ok, not quite done. What gives tsukune flavor is teriyaki sauce. While the meatballs are still hot, dip them in teriyaki sauce. The meatballs absorb the sauce and they become super juicy. Teriyaki sauce is really easy to make - dilute 2 TB of sugar in 50 ml of soy sauce and 50 ml of mirin. Bring it up to a boil then simmer for about 10 minutes. As it simmers, the sauce thickens and starts to look like the teriyaki sauce you know and love.

Monday, March 8, 2010

Everyday Harumi :: Fried Chicken and Spicy Eggplant

I decided to make the fried chicken again after catching the Your Japanese Kitchen, the Harumi Kurihara cooking show on NHK World. On the show, she cut the pieces smaller - nugget sizes - which did make it much easier to cook. She also said to lift the chicken out of the oil 3-4 times while frying to make the nuggets extra crispy. It works, but is a little scary - one slip of a chopstick and SPLASH - fried oil cannonball!!!

I'm a little tired of rice eight now so I made cold udon noodles instead - kind of unorthadox for fried chicken, but yummy nonetheless. This was my first go at the spicy eggplant side and must say, I'm
blown away at how delicious it is. I don't actually like eggplant all that much, but this was really flavorful. The texture is my main issue, but this tasted so good I didn't care about the mushiness. The eggplant is deep fried then tossed in a dressing of soy sauce, mirin, rice vinegar, minced leeks, ginger, garlic and chili peppers. I used it as s topping for my udon bento today and it was a great combination.

Sunday, March 7, 2010

Everday Harumi :: Tofu Steak

After the deep fried chicken, I decided to go vegetarian the next day. I really like tofu. I like the many textures it comes in - super silky to firm and crispy and I like both sweet and savory tofu dishes. I also like that you don't even have to cook it - I'm not so great with judging when meat is done. This is a really easy dish to make. The hardest part is handling the soft tofu from dredging to pan frying. It breaks easily so if you can make smaller "steaks", the better.

Everyday Harumi's recipe calls for banno sauce which is just mirin and soy sauce simmered together with kombu seaweed. The kombu thickens up the mixture, making it a little syrupy. If you don't want to make the banno, you can top the steaks with soy sauce.

Wednesday, March 3, 2010

Everyday Harumi :: Deep Fried Chicken with Spicy Leek Sauce

 
I'm in a big Japanese cooking phase right now for dinner and mostly using Everyday Harumi as my guide. I am finding that I'm saving a lot of money and also eating healthier. Granted yes, a lot of things are deep fried and seem to contain a lot of sodium from all the soy sauce, you eat a more diverse plate - meat, veggies and rice. Since I already stocked my kitchen with all the basic Japanese ingredients, I usually only need to pick up my protein and veggies at the grocery store. 

Last night I made deep fried chicken with a spicy leek sauce and a side of quick pickled cucumbers. I don't do a lot of deep frying and I have to say, I kind of hate it. It's kind of dangerous, scary and if something has a lot of butter or oil in it, I prefer not to see how it is made. As much as I love Paula Deen, it kind of makes me cringe. Don't get me wrong, I'll eat it and love it -- I want to be ignorant to the process. The chicken was really good -- once I threw out all the undercooked pieces. One thing I dislike about Everyday Harumi is that her instructions are sometimes vague. "Deep fry until cooked through and golden brown." Apparently, my definition of "golden brown" would give you salmonella. 
The pickles were pretty good, but I made it a little sweet. The recipe calls for sesame oil to taste and I would suggest a teeny tiny itsy bitsy drop of it.

Tuesday, March 2, 2010

Everyday Harumi :: Green Beans with Pork and Kinshi Tamago Crepes

My desire to experiment with new recipes comes in waves. Sometimes you want to try something new, but on busy weeks, you just want to make something easy and familiar. Every now and then though, you make something new that tastes like something old and homey. Tonight was one of those times. I dusted off my Everyday Harumi cook book and made a simple dish of white rice topped with green bean and minced pork. Super duper simple, healthy and oh so tastey. I suspect this will become a weeknight staple in my home. I enjoy her recipes because most are simple with few ingredients and they always make great leftovers for lunch.

To liven up the dish, and to use up some soon to be questionable eggs, I made kinshi tamago (egg) crepes. It's basically a very thing egg omelet that is then thinly sliced to make really delicate egg "threads". Egg omelets and scrambled eggs are popular bento options in Japan. I like the color it brings to your plate and they taste good too. They're sweet because of the sugar and light because of sake. Cooking them on a lower temp will help keep the bright yellow color.

I'm looking forward to my leftover bento lunch tomorrow!

Tuesday, February 9, 2010

Momofuku Love in Japan

I'm not sure if you know about my obsession with David Change and his Momofuku empire...if not, refer back to here, here, here and here. My sister gave me the BEST (and only by the way...that's right, I received ONE Christmas present this year...and it was in January...do I sound bitter?!) Christmas gift a girl (like me) could ask for - an autographed copy of the Momofuku cookbook. Voila!
Full disclosure, I knew this gift was coming and I asked her before she went to his book signing, to ask him to write down some food recommendations in Tokyo, since, like a stalker, I knew that he had lived here once. David Chang's advice?

"Get lost in Nakano + Ogikubo  best spots for eats."

Ok! So we did get lost in Ogikubo a few weekends ago and we did stumble upon some great finds. I had a soy bean donut (sounds gross, but it was very tasty) and yummy keiten sushi. I hear Nakano is supposed to be pretty cool, so we'll be heading there sometime soon.

The cookbook itself is pretty bitchin'. I mean, it has all the staple Momofuku recipes in it, but to be honest, I'm probably not going to ever make my own ramen and I definitely will never have a need to recreate the Ko Caviar egg. What is cool about the book is the story he tells about his journey to where he is now. He talks a lot about living in Japan and his obsession with noodles and ramen. Since I live here, that part is particularly interesting. I guess maybe if you don't know about the Momfuku hype, the book is kind of whatevs, but I love it. I tried one of the more accesible recipes, the spicy pork and rice cakes, a few weeks ago and it was BLOWWWINYOFACEZOMGSOOOOOGOOOD. No seriously. Licked the pot clean in under an hour. If you have the book, I recommend trying this one out first since it will stock your kitchen with the ingredients you need for all the other stuff.


PS - I just read that Christina Tosi, the pastry chef for Ko and Momofuku Milk Bar is working on a Milk Bar cookbook. Courtney, if you're reading this, that's what I want for Christmas next year.

Tuesday, December 8, 2009

Homemade Gyoza

I was feeling rather adventurous tonight so I decided to make gyoza for dinner, from scratch. The actual gyoza filling is quite simple- ground pork, ginger, garlic, scallions, napa cabbage, chives, soy sauce, sake, sesame oil and pepper. You just chop everything into small crunchy pieces and mix it with the pork. Let it marinate for about and hour...then the tough part. Assembling the gyoza.

I referred to a YouTube video entitled Cooking With Dog in which a cute Japanese woman makes gyoza with her poodle sitting obediently on the counter while her son narrates the steps in English. Her fingers move
so quickly to fold the gyoza, I had to rewatch it at least 10 times. My dumplings ended up looking more like perogis...which is fine, but not exactly what I was going for. By my 20th try, I was starting to get a handle on things, but alas, I ran out of filling.

Cooking the gyoza is pretty fast but is more involved than you would think. You first brown the bottoms on medium heat in an oiled pan. Then, you add boiling water so that it comes up to about halfway of the dumplings. Cover immediately and let steam-fry until the water has disappeared. Last step: add some sesame oil to the pan and fry the bottoms once more, but don't burn 'em!

I like to dip my gyoza in a mixture of soy sauce and rice wine vinegar. If I'm feeling sassy, which I normally am, I add some chili oil or Sriracha.

My first try was pretty successful and I can't wait to give it another try and experiment with different fillings.

Don't they look yummy?!

Sunday, October 25, 2009

Harumi Kurihara :: The Japanese Martha Stewart


I'm not shy about my love for Martha Stewart so when I heard about Harumi Kurihara, I couldn't wait to learn more about her. She is often referred to as Japan's Martha Stewart. She is a self-taught cook from Shimoda, and she specializes in classic Japanese homestyle cooking. She was encouraged by her TV anchorman husband to write a book, so she did, and now has numerous successful cookbooks, a magazine and a cooking and clothing line. Impressive! I got one of her English cookbooks (Everyday Harumi) for my birthday and couldn't wait to try out the recipes. I have been trying out simple Japanese dishes for the past few months so I'm not a total Japanese cooking beginner. In fact, I can probably whip up Japanese food better than I can bust out Vietnamese. FOR SHAME!!

Japanese cooking is very simple. Once you stock your kitchen with a few key ingredients (rice vinegar, soy sauce, sake, miso and mirin) you can make tons of healthy, tasty and easy dishes. There is a great website called Just Hungry that teaches awesome Japanese recipes and the stories behind them. Some of my favorites from Just Hungry have been the Soy Sauce and Butter New Potatoes (addicting!) and the Miso Pork. I have been a little frustrated trying to make recipes out of my American cookbooks because I can't find the right ingredients here in Japan but now that I am experimenting with Harumi's book, things have gotten much easier.

My first stab at her book was the Ginger Pork over a bed of Bok Choy and a side of Sesame Dressed Green Beans. The pork was as simple as mixing 4 ingredients for the marinade, dipping the sliced pork in the marinade and pan frying it for 2 minutes. You let the pork rest on the stir fried bok choy, and the juices from the pork dress the veggies. SO YUM. Everything turned out great and I have been eating leftovers for days. If you're in a cooking rut, try cooking some Japanese dishes! They're very well balanced and it's fun to try something new in the kitchen.