Showing posts with label baking. Show all posts

Tuesday, February 1, 2011

Brioche :: Eggy, Buttery, Sugary Good


I haven't done a lot of home baking in 2011. Maybe it's because I was burnt out from the Great Christmas Cookiefest of 2010 or pre-occupied with the half marathon healthiness. But now that things have calmed down, I've been turning to my trusty cookbooks for some at-home fun. I was feeling ambitious last weekend, so I gave Joanne Chang's Flour Bakery Basic Brioche recipe a try. The basic recipe can then be used to make different treats like gooey cinnamon rolls (the ones that beat Bobby Flay's throwdown) and various other morning sweets. I chose the Brioche aux Chocolat and Sugar + Spice Buns.


Fun fun fun! Ever since I started my bread courses at ABC Cooking Studio, I haven't really utilized the dough hook on my Kitchen Aid Stand Mixer. If I bake bread at home, it's a good opportunity to try out the tips and tricks I've learned in class and we always knead by hand. But that's messy. And this recipe  is especially messy, calling for 6 eggs and 2 1/2 sticks of butter. Plus, Joanne Chang gives really detailed instructions on making the dough in a mixer, down to the sounds (slap slap slap) and feel (cold playdough) of the dough. Seriously, it's really hard to mess up her recipes. From her book and some magazine interviews, I get the sense that she truly understands what it's like to be a baking hobbyist. She recognizes the motivations, struggles and insecurities we all face when baking at home, alone. Which is my way of saying, get the book.


Of the two, I preferred the Brioche aux Chocolat. The melted chocolate and warm pastry cream center go perfectly together. Again, the pastry cream recipe in the book is so detailed, it is pretty hard to botch. Timing and temperature are key but if you read the instructions a few times beforehand and are well equipped with your ingredients in place, you can't fail.

The basic brioche dough recipe in the book is BIG. Like I said, 6 eggs and 2 1/2 sticks of butter. But that is so that you have a dough large enough to knead properly in a standing mixer, so you can freeze the dough for up to a week and try out the various morning treats over the course of a few days. It really is the gift that keeps on giving.

Sunday, November 21, 2010

Making Creme Fraiche :: A Journey

So, as you know, I'm pretty obsessed with the Flour Cookbook right now. Joanne Chang says that her magic ingredient is Creme Fraiche. When I lived in NY and was feeling fancy (which, let's face it, was all the time) I would buy creme fraiche, whip it with some sugar and eat them with strawberries. I don't know why I felt that this was necessary. Maybe it made me feel like I was living in a magical world like Amelie and not in a tiny apartment with a rat named Stuart above a pizza joint.

In any case, I like to stay true to recipes so that I can blame the recipe and not myself if things don't work out. Creme Fraiche is not sold in Japan. At least not in any of the 7 grocery stores I checked this week. So, I googled around and learned that it is really easy to make at home and only takes about 24 hours. In theory. It took me about 7 days, 7 cartons of heavy cream and a lot of experimenting. Why?

1. Because I am not my mother or Alton Brown, and don't know the slightest thing about food sciences.
2. Because I live in Japan and am limited in my ingredient acquisition.

Round 1: Buttermilk and Heavy Cream

The most common recipe for Creme Fraiche (online at least) is to add 2 tablespoons of buttermilk to a cup of heavy cream and let it sit at room temperature for 1 to 3 days. Easy enough. Buttermilk is not sold in Japan, but I also learned from ABC Cooking School friend and various online resources that you can easy make it at home.

How to Make Buttermilk: 
Just add 1 tablespoon of white vinegar to a measuring cup, then add milk until you reach the 1 cup line. Let it stand for 5 minutes, and you have buttermilk!

Sort of. Actually, this will give you a very good buttermilk substitute. There are no live active cultures in it, which is not necessary for making delicious buttermilk pancakes and biscuits, but definitely necessary for making creme fraiche. Unfortunately, I learned this the hard way when I realized that the heavy cream I left out for a day was still very runny, a little curdled and super rancid.

Round 2: Buttermilk Powder

This round didn't actually last long because I was wise enough to google the answer before wasting another carton of heavy cream. I found buttermilk powder, another good buttermilk substitute for baking, at a kitchen supply shop in Shinjuku. Again, no active cultures thus, no creme fraiche.

Round 3: Sour Cream vs Yogurt

I finally wised up and did some hardcore forum trolling. Though buttermilk + heavy cream is the more popular method, you can also make creme fraiche with heavy cream + sour cream and heavy cream + yogurt. Sour Cream and yogurt are both readily available here, so this seemed like a positive turn in my quest for this stupid cream.
 The players. On the left, 1 cup of heavy cream and 2 tablespoons of sour cream. On the right, 1 cup of heavy cream and 2 tablespoons of plain yogurt with active cultures. 

So, how'd it all work out? On the left, the sour cream version. On the right, yogurt. They both thickened up quite a bit, even after a few hours. The sour cream version was by far more flavorful, creamier and most resembled creme fraiche. The yogurt kind was passable, but kind of a loser.

So there it is! Sour cream wins and I can now sleep at night. I read while I was at the bookstore today, that Julia Childs preferred homemade creme fraiche made with sour cream to that made with buttermilk because it was less tangy. I'm ok with tang, but if it's what Julia prefers, that just makes it all the better. 


 How to Make Creme Fraiche in Japan (or anywhere you can find Sour Cream) 

 1. Heat 200ml (1 cup) of heavy cream (35% fat or more) on low heat just take the chill off.
2. Add 2 tablespoons of sour cream to a jar, cup or bowl. Add about 1/4 cup of the warmed cream to the jar and mix until smooth. This works out all the clumps of the sour cream. Using just a little cream makes it easier (and cleaner) to mix vigorously. Then add the rest of the cream.

 3. Cover loosely with saran wrap, a tea towel or jar lid. Place in a warm spot for 24 hours. I chose the top of the fridge because I read somewhere that this is the warmest place in your kitchen. Another good spot would be your oven with the oven light on. Mix every 6-8 hours if you can.

4. After 24 hours, it will be much thicker. Give it a good mix, then cover properly and put it in the fridge for another 24 hours. It will thicken up more in the fridge and can be used immediately. I don't know how long it will keep, but I imagine 4-5 days. Just be smart about it - you know bad dairy when you smell it.

Wednesday, November 17, 2010

The Flour Cookbook and How It Turned Me Into A Stalker


I recently acquired a Kindle. I really love it even though I swore I would miss the feel of its printed ancestors. My Kindle will never replace my love for wandering around bookstores and it certainly won't take the place of my growing collection of cookbooks. I had added the flour bakery cookbook to my Amazon wishlist knowing that no one would ever buy it for me, so I'm lucky that I stumbled upon it on my latest bookstore bummel. 

This. Book. Rules. For oh so many reasons. First of all, I love the author/baker's backstory. She's Chinese-American, graduated from Harvard with a degree in Applied Mathematics and Economics, did the whole 90's Asian kid thing (ie - had a stable, high-paying job after college) then did the whole new millenium Asian kid thing (ie - pursued what she really wanted because she listened to her parents, got a good job and now has some money to use towards her passion and is equally as successful and double-y as happy than before). A few years apprenticing at some prestigious patisseries and bakeries around the Northeast, now she's the mastermind behind 3 Flour Bakeries in Boston! And she's ran in every Boston Marathon from 1991 to 2006 to boot! She's kind of my hero in every single way.  

Reason number two why this book rules: These are classic American recipes done right. They're simple with the right amount of pizazz. She explains the science behind baking which is always fun and jazzes up these American classics with yummy ingredients like creme fraiche, candied ginger and black sesame seeds. How worldly. 

Reason number three why this book rules: The recipes are both in cup measurements and weight measurements! I can't even begin to tell you how big of a deal this is to me. Japan is a metric country and weighing food is faster, cleaner and more precise. It makes it easier to divide and multiply recipes. When I buy ingredients, I can read how many grams I get in one package, so I'm sure to get enough. Most American cookbooks don't use metric, so I started buying English cookbooks...which is fine. I've got a lot of great Sticky Toffee Pudding recipes but I'm an American! I want chewy cookies, fluffy frosting and pies! (Pies not filled with meat, mind you.) 

Reason number 4 this book rules: It's published by Chronicle, which is one of my favorite publishers. Why? Because they always publish books from people I really like (Tartine, Martin Yan, Chiarello) and their hardbound books lie flat without weights on top of it. MONEY. And they're from San Francisco. West coast bias. 

I haven't taken my nose out of this book since I got it over the weekend. I've never even been to Flour Bakery, or Boston for that matter. But I sort of geeked out over the wekend and while I was on their website, I saw a link about the cookbook asking people to email her...so I did! And you know what? She wrote me back! I swear! I mean, at least her PR team did...but it does seem pretty legit: 

Hi Kimberly!
I'm thrilled you are enjoying the book! And even more thrilled that you use metric- so hard to get people to switch and as you know it's so much easier. I can't wait to hear about your baking- please do keep me posted.
Thank you for your wonderful email!
Best,
Joanne

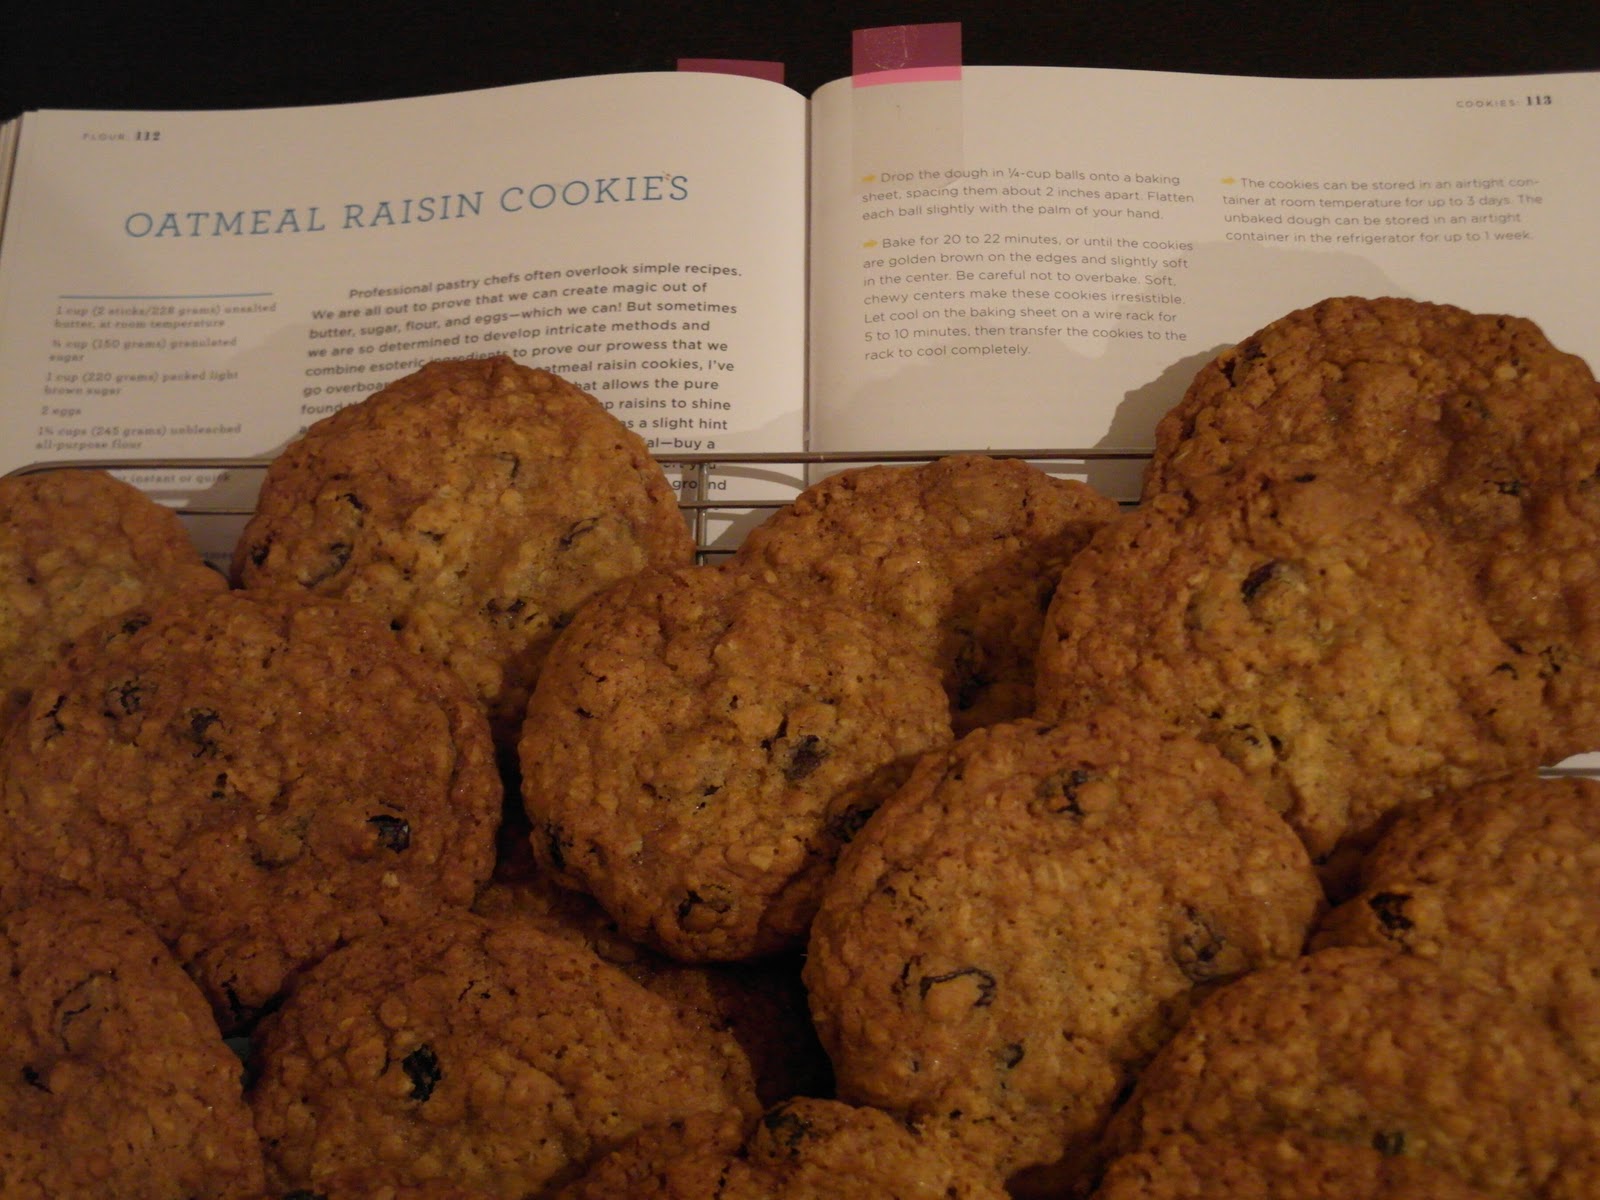
Real or not, it was cool to get a response and it only inspired me more to actually make one of her recipes. I started with the Oatmeal Raisin cookies tonight and the smell alone was enough to make this book worth it. It's a very simple recipe, but simple is good. I have a ton of other pages marked for the weekend. It's a good thing I started running more because me and my tummy would be in big trouble otherwise. If it isn't obvious, I high recommend this book. It has a lot of great show stoppers, everyday treats and tips you'll love. I promise!

Tuesday, September 14, 2010

Trying It At Home :: Pain d'Or


I've been taking bread classes for about a month now. To be honest, I wasn't that excited about the bread course. I was more interested in the cake classes but I figured, I should branch out and try something new. It wasn't enough that the classes are in Japanese, I needed even more of a challenge. I'm such a go getter!

I'm so glad I went outside my comfort zone because making bread is AWESOME. Aside from a phase in my parents' life when a bread maker was purchased and used to make walnut and raisin bread, I don't have much experience baking bread. After 7 classes, that is no longer true. Up until last weekend, I had been under careful supervision which means that my recipes turned out perfect every time. I decided to take the training wheels off and give the pain d'or recipe a go.

Here we are with the basics. Bread flour, yeast, sugar and eggs. Two points to note here: always put the bread and sugar next to each other since as we all know from chemistry, yeast eats sugar and putting them close to each other accelerates the process. The egg should be somewhat separate from the sugar and yeast for reasons I'm not quite sure of because, like I said, my classes are in Japanese. All I know is that we always need to make an "egg pouch" in the bowl.
Here we are with more bread flour, salt and butter. This is the beginning of the dough formation process. Stir like a mad woman until the mixture turns into a ball.
Thank goodness for the marbal countertops! Dump the ball of dough onto a clean work surface and start kneading. There are two types of needing...the uhh...normal kind, which is to mix and work the dough. Once the dough is mixed well enough, it is time to move onto the V-style where you roll the ball back and forth in a V shape. When the surface is smooth and you see big gas bubbles, your dough is ready to rest.
After the dough has rested for awhile (each recipe calls for a different time, but it's normally around 30 minutes) you can do a finger test to see if it is ready. Coat your finger in flour and poke the dough. If the hole stays, it's ready. If the dough springs back, it needs to rest more. If your dough is ready, punch the ball a few times to release the gas.
Cut the dough into equal parts and shape them into round balls. Before you work the dough more, they need to rest again for about ten minutes under a damp towel.
Each recipe calls for a different shaping. Pain d'Or look like little mini-baguettes with cuts at the top. I've always wanted to make the cool cuts at the top of bread! Dream fulfilled! A healthy brush of egg wash on top and into the oven they go!
And voila! These baked for only 12 minutes and they were nice and fluffy. This was a really simple bread but most of our classes involve all of the steps above with varying rest times, toppings, fillings and shapes. This first solo attempt was successful, but not perfect. Hopefully the next batch will be better but even imperfect fresh baked bread beats the store bought variety.

Wednesday, August 25, 2010

Happy Birthday Cup Cake...Cake


Happy Birthday Squidward! One of the very first things I made in my Tokyo kitchen was a birthday cake for Squidward. Last year, it was a Martha Stewart chocolate cake with cream cheese frosting, adorned with a candied smiley face. This year, I went with a super moist chocolate cake with chocolate fudge frosting from the always amazing and drool worthy Smitten Kitchen blog. In one of Deb's posts, she talks about how she wanted to make a cake version of a Devil Dog or Hostess Cup Cake. Unfortunately, things didn't quite work out when she gave it a go, but I decided to give it a shot and tada! Here is the finished product. Look familiar? 


The layer inside the cake (and the swirls on top) is a recipe similar to the yummy marshmallow filling you'd find in a Ding Dong, Cup Cake or Devil Dog. Seven Minute Frosting is the name. Even though it took a lot of sweat and muscles to make (beating the egg whites by hand over simmering water....Big Blue Betty was of no help to me here) it really made this cake authentic and cut some of the over the top chocolatey-ness. If you're going to make a chocolate cake in the near future, USE THIS ONE. It is devine. As for the filling...be sure to eat the cake fast because the seven minute frosting will eventually absorb into the cake. 

I read A LOT of food blogs thanks to my Google Reader. (Why isn't everyone using it already?!)  I'd say that 90% of my kitchen experiments are inspired by the things I read online. However, when it comes to baking, I really need to be more diligent about converting the recipes to be Japan friendly. I made this recipe as it is shown on Smitten Kitchen and I'm lucky everything turned out ok. Ovens and cake pans are MUCH smaller here so I had a ton of leftover batter and a little bit of cake overspillage on the first batch. (This just means I have 4 extra cakes in the freezer...wah wah) And as I mentioned before, ingredients are measured in grams, milliters and CCs. Even the Japanese Cup is different from the American Cup. 200mL vs. 237 mL respectively. I just learned this last tidbit yesterday and it blew my mind. So, I've started keeping an Excel document that will help me convert these American recipes into Japan friendly portions as not to waste ingredients and bake more accurately. 

Thursday, September 3, 2009

Baking in Japan


The roomie's birthday was a few weekends ago and to celebrate, I dusted off my beautiful Blue Betty mixer and baked him a cake. I'm quite the baker, if I may say so myself. I enjoy it more than I enjoy cooking. I'm not very free form and I like to stick to recipes as they were written. What can I say, I'm not a rule breaker.

Settling into Japan, the last thing I thought would cause me great stress was baking cake. There were a many obstacles along the way. Let me explain:

1. I don't read a lot of Kanji. The Japanese language uses 3 alphabets: Hiragana, Katakana and Kanji. Hiragana and Katakana are like the letters of the alphabet and they're pretty easy to pick up once you become familiar enough. Kanji on the other hand is a beast. Kanji are Chinese characters adapted to the Japanese language. Each character can have several meanings depending on the situation. Learning Kanji is straight memorization and recognition. You need to know around 2,000 Kanji and all their meanings in order to read the newspaper. It's such a complicated system that even the not-for-long Prime Minister, Taro Aso, jumbled meanings in public speeches a la
George Bush. Anyhow, because I know about 7 Kanji total, it made grocery shopping incredibly difficult. Is this flour or cornstarch? Sugar or laundry detergent? Where do I find Baking Soda? What is Vanilla Oil and is it the same as Vanilla Extract? Headache!

2. While my kitchen is super fancy and high tech, sometimes you just don't need technology to intervene. In America, the oven usually resides under the stove. In Japan, this is a shoebox sized fish fryer. Not big or hot enough to bake a cake. Instead, we have a dual microwave/convection oven the size of a standard microwave. It's basically an Easy Bake Oven for grown ups. This thing is cool in theory, but when you don't know how it works, it is the scariest thing in the world. There are so many buttons and none of them have any meaning to me. (See point 1) At one point, I think I microwaved my batter for about 7 minutes. Double headache!

3. Conversions and measurements. Math - ack! Thank goodness for the Internet. Because the ovens here are tiny, the cake pans are also very tiny, so I had to decrease the amount of batter I was making. Not that big of a deal. There are tons of great recipe conversion sites out there that do all the work for you. What is not so fun is taking standard cookbook measurements and converting them into weight. I could not find measuring cups to save my life here. Instead, I bought a kitchen scale and had to weigh all the ingredients. As you know with baking, perfect measurements are vital to a successful treat so this was kind of stressful. Butter is not pre-measured in convenient quarter cup sticks here, so things got a little messy at this point. Fret not, I'm feeling better about the scale debacle after reading this post on Gizmodo.

After all was said and done, the cake came out pretty amazing. I made a Martha Stewart Devil's Food Cake with Sprinkles' Cream Cheese Frosting. The sour cream in the cake batter keeps the cake super moist. The one good thing about baking in Japan is that the easiest thing to find are super cute cake decorations. They're pretty cheap and readily available at the grocery store or drugstores. Presentation and packaging are SO IMPORTANT in Japan, almost to a ridiculous degree. After all the Kanji, measuring and oven hullabaloo - I ended up with a happy birthday boy and a very cute cake.


Wednesday, June 3, 2009

Martha Stewart OmMmmnimedia


I never quite understood the Martha Stewart thing, but as I've gotten older, I have started to realize that she is quite amazing. Maybe not her personally. That whole securities fraud thing was not hot, nor was her appearance with Busta Rhymes at the 1997 MTV Video Music Awards. Know your place Martha! But when she's on, she's on. I admire the brand that she's built. I never identified myself as a "Martha" girl, but she snuck her way into my life so I'm not fighting it anymore. Two of my dirtiest cookbooks (stains and dog eared pages = sign of a great cookbook) are Everyday Food's Great Food Fast and Martha Stewart's Cookies. Everyday Food's is a great brand extension for Martha. It's pretty much 30-Minute Meals minus the "YUM-O!". (Dont' even get me started on Rachel Ray...) I've made about 60% of these recipes and my dining companions and I have liked them all. There's a lot of diversity in the recipe (Mexican, Asian, Italien and American) and she keeps the ingredients simple. Simple is good for weeknight meals. Martha Stewart's Cookies was an impulse buy over the holidays and I am so glad I have this in my kitchen library. She divides the book into types of cookies (crispy, chewy, cakey, sandy) and there's something for everyone. I think this book is responsible for my department's winter weight gain. I've never purchased so much butter in my life but I had to put that beautiful blue Betty you see in the picture above to work. Both books have easy to follow instructions, tips on the basics and enticing color photos for each recipe.

Martha's at it again with the upcoming release of Martha Stewart's Cupcakes. I have no doubt that this book will be a hit, which is why I pre-ordered it 2 months ago. (Damn you Amazon!) If you don't want to shell out $15 for the book, you can get a taste of what Martha has to offer on her website. In honor of the new cupcake book, she's replaced Cookie of the Day with Cupcake of the Day. I probably won't even make a cupcake that looks like a hamburger, but it's fun to see what other people can do.